Showing posts with label book. Show all posts
Showing posts with label book. Show all posts
Thursday, 3 August 2017
Monday, 17 April 2017
Book Clutch DIY
I happened to see this DIY on the channel Mad Stuff with Rob and instantly fell in love with the idea. All the items that i have used in this project are from ItsyBitsy.
You need the following items for this DIY
1. Leather Paper
2. Chipboards/Cardboard
3. Foam board
4. Embellishments for decoration
5. Magnets
6. Acrylic Paint
Procedure
1.Take a leather paper of the measurements 16inches X 11 inches as shown below.
2. Cut two chipboard or cardboard of measurements 6inches X 9inches and another one of 1inch X 9inches and place them on the leather paper as shown.
3. Fold and stick the sides and upper part of the leather paper as you would do while binding a book with cover.
4.Take another sheet of leather paper to cover the chipboards and stick it in place. While sticking the inner paper make sure to not stick at the left hand side in the middle. We will place a magnet here later.
6. To make the inner box i have used foam board. The longer sides of the rectangle boxes are 2x8 inches and the shorter sides are 2x5.5 inches. For extra stability i used an extra foam piece on each side.
You need the following items for this DIY
1. Leather Paper
2. Chipboards/Cardboard
3. Foam board
4. Embellishments for decoration
5. Magnets
6. Acrylic Paint
Procedure
1.Take a leather paper of the measurements 16inches X 11 inches as shown below.
2. Cut two chipboard or cardboard of measurements 6inches X 9inches and another one of 1inch X 9inches and place them on the leather paper as shown.
3. Fold and stick the sides and upper part of the leather paper as you would do while binding a book with cover.
4.Take another sheet of leather paper to cover the chipboards and stick it in place. While sticking the inner paper make sure to not stick at the left hand side in the middle. We will place a magnet here later.
5.You should be able to fold the cover and it should look like a book now.
6. To make the inner box i have used foam board. The longer sides of the rectangle boxes are 2x8 inches and the shorter sides are 2x5.5 inches. For extra stability i used an extra foam piece on each side.
7. Stick it as shown below to form a rectangle box.
8. Paint or decorate the box as you want and stick a magnet in the middle of the outer side.
9. To cover the magnet and the rough edge of the box i used chipboard on the outer frame. I did not have enough to make a continuous outer frame so i cut the pieces separately. But if you can cut a continuous frame to cover the outer side to get a cleaner look. Paint the chipboard.

10. Stick the box onto the inner side of the book.
11. Decorate the book as you want. I went for an encyclopedia look.
Few points to be noted:
I did not use a glue gun for this project since i found that it does not work well with foam boards. I used normal PVA glue.
Take proper measurements for the cover as well as the inside box before hand. If there is a mistake and you have already cut the paper or foam board it will be a problem later when you put everything together.
Thursday, 16 July 2015
Mini Bookshelf
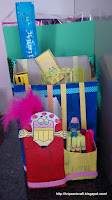
I had lot of empty boxes and was thinking of throwing them when i thought why not try and turn them into something useful.
This particular box was appropriate for a mini bookshelf or a storage drawer.
You need the following items:
-An empty box
-Cardboard pieces
-A glue gun
-Pipecleaner
1. Take the empty box and cut out the top flap. If you want an open shelf cut out all the flaps. I wanted to make a door so i cut only the top flap.

2. Take 3 cardboard pieces. The first one should be equal to the length of the box. The other two should be half the height of the box.

3. Hot glue the two cardboard pieces on each lower end of the box across the width. Then hot glue the last cardboard piece across the length in the middle and above the two cardboard pieces. This will create a shelf.

4. If you want more shelves just add more cardboard pieces along the height of the box.
I wanted a door so i did not cut the other two flaps. I made a hook using pipecleaners to close the door.
Your mini bookshelf is ready.


I did not have any decorative papers. But to make it look better wrap it in gift wrapping or decorative paper.
This particular box was appropriate for a mini bookshelf or a storage drawer.
You need the following items:
-An empty box
-Cardboard pieces
-A glue gun
-Pipecleaner
1. Take the empty box and cut out the top flap. If you want an open shelf cut out all the flaps. I wanted to make a door so i cut only the top flap.

2. Take 3 cardboard pieces. The first one should be equal to the length of the box. The other two should be half the height of the box.

3. Hot glue the two cardboard pieces on each lower end of the box across the width. Then hot glue the last cardboard piece across the length in the middle and above the two cardboard pieces. This will create a shelf.

4. If you want more shelves just add more cardboard pieces along the height of the box.
I wanted a door so i did not cut the other two flaps. I made a hook using pipecleaners to close the door.
Your mini bookshelf is ready.


I did not have any decorative papers. But to make it look better wrap it in gift wrapping or decorative paper.
Subscribe to:
Posts (Atom)


